Ultimate guide to setting up Facebook Instant Articles on WordPress
Setting up Instant Articles can be tricky. It’s not overly difficult but there are a lot of steps and they can be daunting for new users. Use our simple six step guide below to get up and running with Instant Articles on your WordPress site using the RSS feed method.
Once your site is authorised and you’ve got the basics down you can start to use more advanced features such as the API sync method or the Placement Manager.
#1 Signup
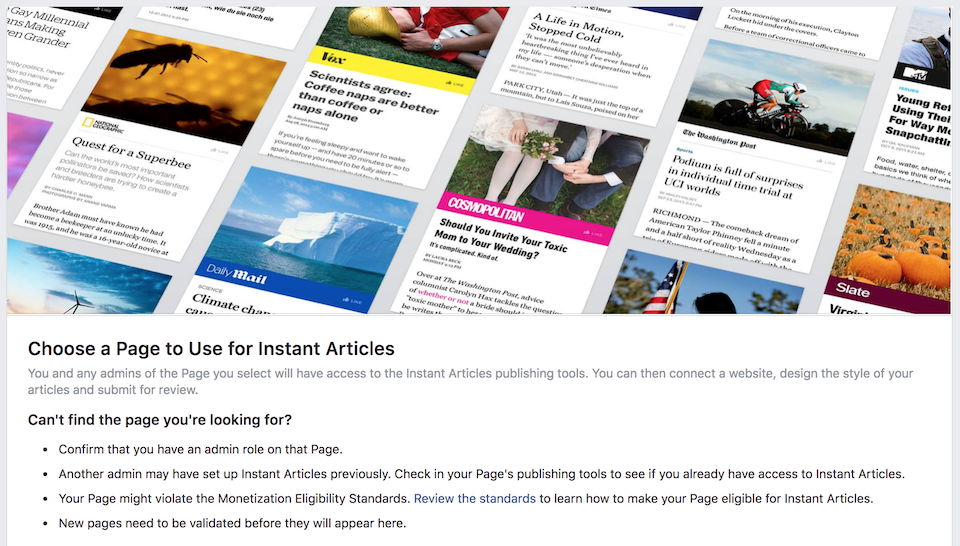
The first step is to enable Instant Articles on your Facebook page (if you have not already done so). This grants you access to all the Instant Articles tools you need to get started.
After signing up you can access the Instant Articles tools for your Facebook Page by going to Publishing Tools at the top of your page, then clicking Configuration under the Instant Articles item in the left hand menu.
#2 Authorize Your Site
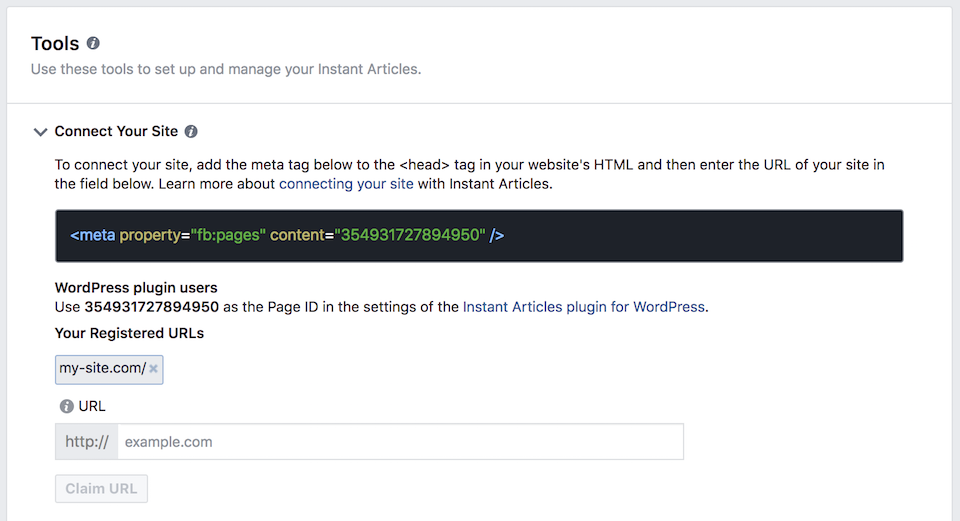
You must register your site URL with your Facebook page before you can begin publishing Instant Articles.
Go to the Instant Articles Configuration screen on your Facebook page, scroll down to the Connect Your Site section and copy the Page ID. Paste the ID you just copied into the Authorization ID field on the General Settings page of this plugin and save it.
Copy your site URL (https://wp-native-articles.com) and paste it into the URL input in the Connect Your Site section and click Claim URL.
If you successfully claimed your URL then it should appear under the Your Registered URLs section.
#3 Styling
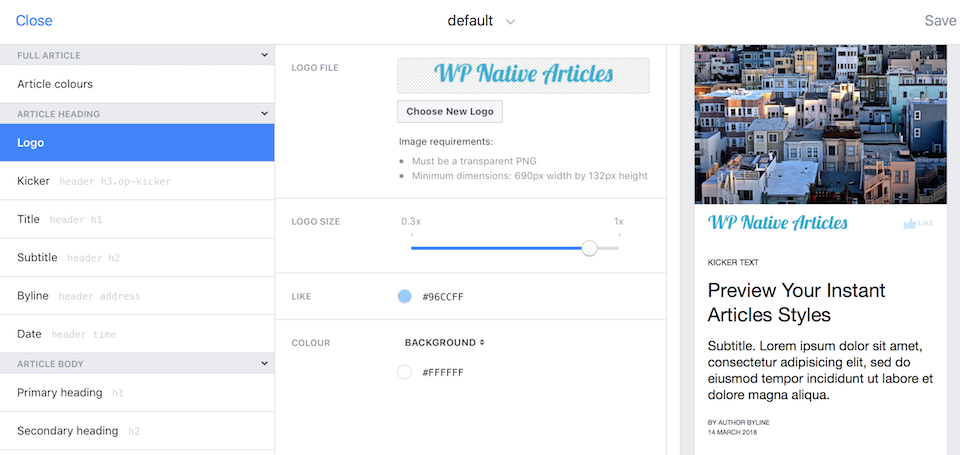
To access the style manager, go to the Instant Articles Configuration screen on your Facebook page and scroll down to Styles. Make changes to the existing default style to begin with.
At the very minimum you are required to upload a logo, but you should aim to style your Instant Articles to look as similar to your site as possible.
#4 Ads & Analytics (Optional)
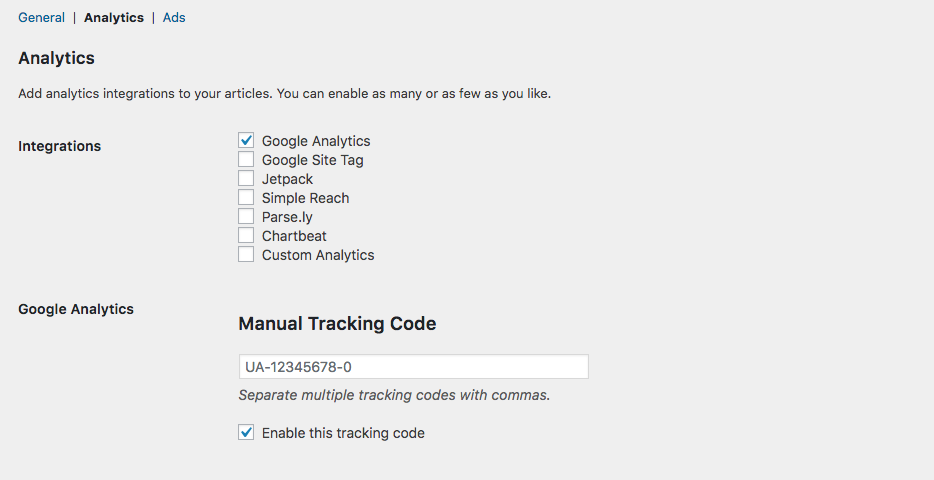
If you are using one of the compatible WordPress Analytics plugins then your analytics should be automatically configured. If not you can manually enable analytics on the analytics settings page.
You can enable and configure Audience Network, as well as custom ads, on the ads settings page.
#5 Import Your Articles
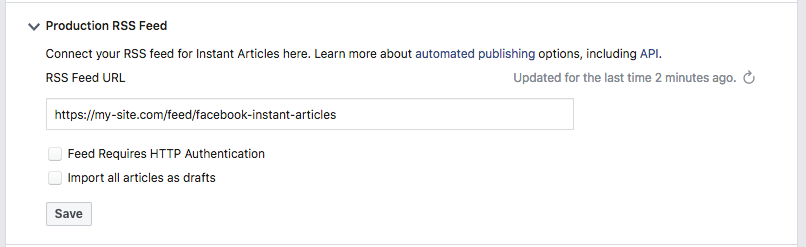
Add your Instant Articles RSS Feed (https://wp-native-articles.com/feed/fb-instant-articles/) to the Production RSS Feed field on the Configuration page to allow Facebook to start importing your posts. It can take upto an hour for Facebook to ingest posts via the RSS Feed method.
Further RSS Feed settings can be found on the RSS Settings page. Once your Instant Articles have been reviewed you should enabled the Cache and Modified Only options for performance reasons.
#6 Submit for Review
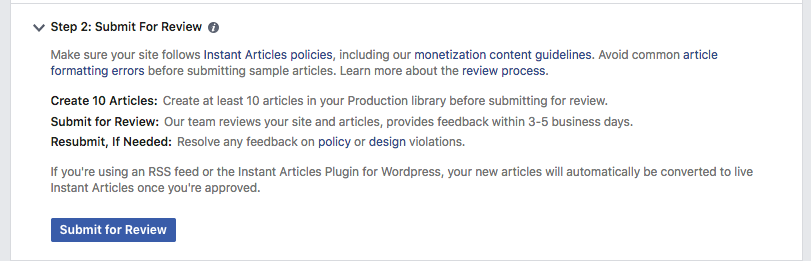
When Facebook has ingested 10 articles you can then submit them for review from the Configuration page. Reviews normally take 3-5 days and once approved your Instant Articles will be live. Any posts you share to your Facebook page will now automatically use the Instant Article version if it is available.
Tips
– Download the Facebook Pages App to (iOS or Android) to preview your Instant Articles before you submit them. Create Transformer rules to deal with troublsome content.